Install ManagedKube from GKE’s Marketplace


2
Click ‘Configure’ on the ManagedKube application page

3
Pick the cluster you’d like to install ManagedKube on and click ‘Deploy. Wait for deployment
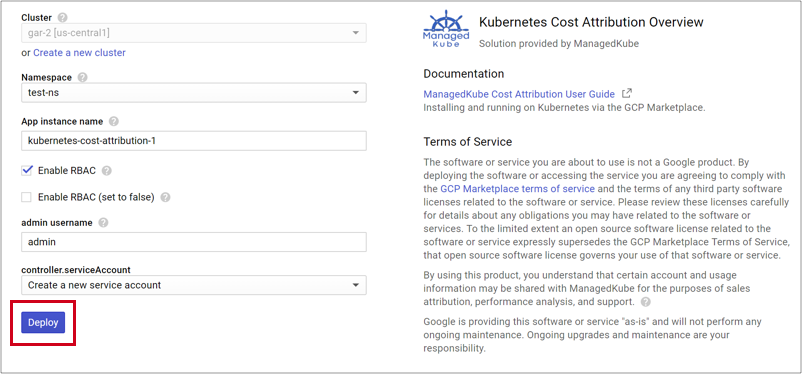
4
Click on Managed-Kube External IP. If you see an External IP of 10.x.x.x, refresh in a few minutes as the external load balancer is being created.
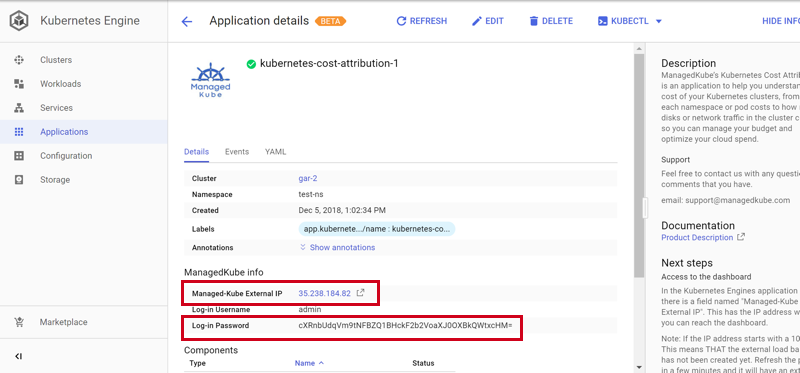
5
Log-in to Grafana using your username and password from the application page in step #4.

6
Click Home in the upper left hand corner
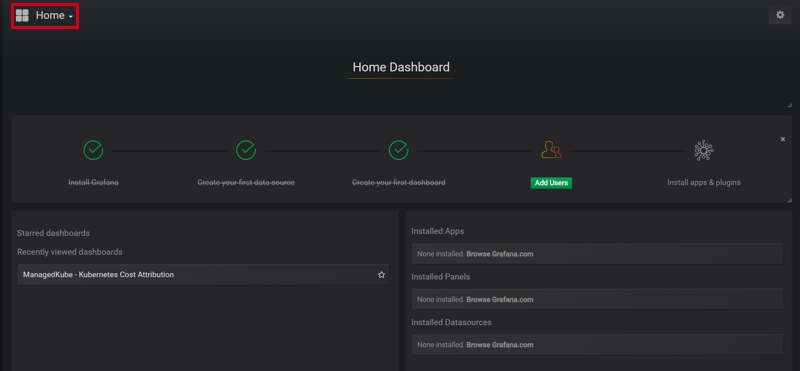
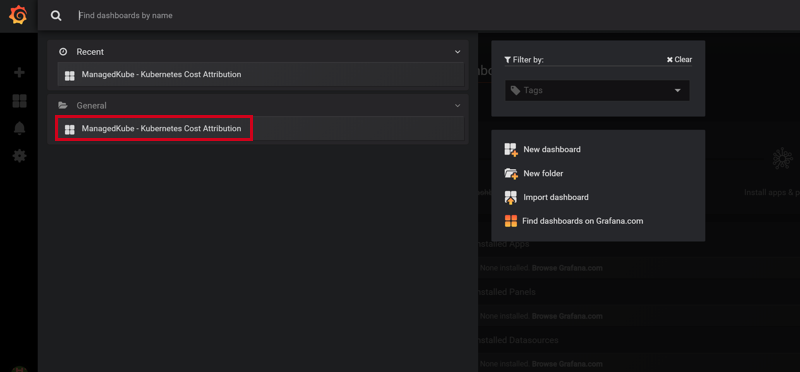
7
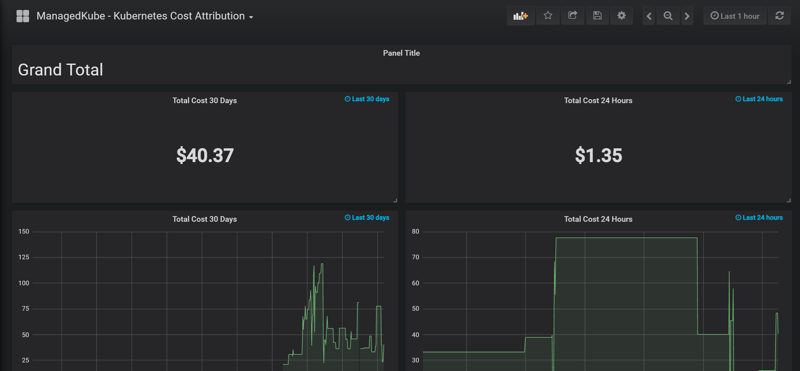
Click on ‘ManagedKube Kubernetes Cost Attribution’ dashboard
8
You’re done! This dashboard will populate over time as ManagedKube collects information on your Kubernetes cluster.